Tuesday 3 September 2019

How to publish RemoteApps on Windows Virtual Desktop using Powershell

To publish RemoteApps on Windows Virtual Desktop, you must create a dedicated Host Pool for RemoteApps. It is not possible to coexist RemoteApps with full desktops. This was the same in legacy Remote Desktop Services. I have already created a new Host Pool using the Portal called “hostpool2”, please note for RemoteApps you must create the host pool with a server operating system.

Use the following command to authenticate to the WVD tenant.

Add-RdsAccount -DeploymentUrl https://rdbroker.wvd.microsoft.com

Use the following command to create a new RemoteApp Group.

New-RdsAppGroup -TenantName "Tenant Name" -HostPoolName "hostpool2" -Name "Demo"

Use the following command to display all the available applications on the host pool VM’s. This command displays 3 variables which are required for the New-RdsRemoteApp command.

1 – App Name: the name of the application
2 – Icon Path: the icon path on the local system to be displayed as part of the published app.
3 – File Path: the raw file path of the exe of the app to be published.

Get-RdsStartMenuApp -TenantName "Tenant Name" -HostPoolName "hostpool2" -AppGroupName "Demo"

Take the info which was displayed in the last step to complete the New-RdsRemoteApp command.

New-RdsRemoteApp -TenantName "Tenant Name" -HostPoolName "hostpool2" -AppGroupName "Demo" -Name "Calculator" -FilePath "C:\windows\system32\win32calc.exe" -IconIndex "0"

Use the Add-RdsAppGroupUser command to grant permissions to users or groups.

Add-RdsAppGroupUser -TenantName "Tenant Name" -HostPoolName "hostpool2" -AppGroupName "Demo" -UserPrincipalName "user1@domain.com" 

Friday 30 August 2019

How to clean up Windows Virtual Desktop tenant deployment using PowerShell

If you have been experimenting with Windows Virtual Desktop you may notice that old tenants that were created still show under the WVD Tenant management portal. These show even if the Host Pool has been deleted from the Portal. The following set of commands can be used to delete the tenant so that it no longer showers in the management portal.


Use Get-RdsSessionHost to find the name of the old Session Hosts.

Get-RdsSessionHost -TenantName "Windows Virtual Desktop Betts" -HostPoolName "host-pool1"

Use Remove-RdsSessionHost to delete the Session Hosts, this needs done even if you have deleted the Host Pool from the Portal.

Remove-RdsSessionHost -TenantName "Windows Virtual Desktop Betts" -HostPoolName "host-pool1" -Name "hoa-wvd--0.domain.com" -Force

Use Remote-RdsHostPool to delete the Host Pool, again this need done even if it’s been deleted from the Portal.

Remove-RdsHostPool -TenantName "Windows Virtual Desktop Betts" -Name "host-pool1"

Use Remove-RdsTenant to delete the old tenant so that it no longer shows in the WVD management portal.

Remove-RdsTenant -Name "Windows Virtual Desktop Betts”

Thursday 29 August 2019

Windows Virtual Desktop - New-RdsTenant throws error "User is not authorized to query the management service." due to Azure AD permission error.

When you try to create a new Windows Virtual Desktop tenant you run the command

New-RdsTenant -Name "Windows Virtual Desktop Betts" -AadTenantId "xxxxx" -AzureSubscriptionID "xxxxxx"

And are faced with the error "New-RdsTenant : User is not authorized to query the management service.". This is due to a permission configuration problem on Azure AD. 

Before you get to the stage of creating a new WVD tenant you must complete the consent process to grand access to your AAD tenant, this can be done here https://rdweb.wvd.microsoft.com/

Once it is done you will notice two new objects under Enterprise Applications for Windows Virtual Desktop, click on the first one. 


You must add a new user account with TenantCreator permissions before you can create a new WVD tenant. Please note that the Global Admin account for the directory does not work, it must be TenantCreator


Once you have a TenentCreator, ensure you authenticate to your directory at the Add-RdsAccount stage using this account before you attempt to create a new WVD tenant. This is where you will be faced with "User is not authorized to query the management service." even if you use a Global Admin account. 

Tuesday 13 August 2019

Setting Azure variables in Windows for Terraform authentication

It is possible to store the environment variables for your Azure in the Windows profile of the machine you are using Terraform from. This prevents the need to store sensitive variables in your Terraform code. The first step is to create new Environment Variables under Windows, in this example I'm using Windows 10 Enterprise. 

The important thing here is what you label the variables, the Terraform program looks inside the Windows profile for the prefix "TF_VAR_" and the suffix must be exact to match the syntax of what Terraform is expecting for example in Azure Active Directory the service principal is called an "application id", Terraform does not understand this as it's looking for "client_id".

Azure Value
Terraform Expects
Windows Variable String
Application ID
client_id
TF_VAR_client_id
Client Secret
client_secret
TF_VAR_client_secret
Tenant ID
tenant_id
TF_VAR_subscription_id
Subscription ID
subscription_id
TF_VAR_tenant_id


Use the following Azure CLI code to authenticate to Azure using the variables:

az login --service-principal -u %TF_VAR_client_id% -p %TF_VAR_client_secret% -t %TF_VAR_tenant_id%

Wednesday 30 January 2019

Configure NLB Nodes for WAP (non domain joined)

You might run into some node-level trust issues if you are trying to configure an NLB cluster for the Web Application Proxy role. 


The best practice from Microsoft states that any servers running the Web Application Proxy role should reside in a DMZ network and not be domain joined. This brings it's own set of issues as the nodes don't automatically trust each other. 

Gone are the days of creating two local administrator accounts on two non-domain joined hosts with the same password and praying it "passes through" authentication requests. Although we are still going to do this, a few other steps must be completed for it to work. 

If you are configuring an NLB cluster on none domain joined nodes, you will probably be faced with "Access Denied" when you attempt to add the second host to the already existent cluster. This is even if you have matching local administrator credentials on both machines. I'm led to believe this is due to later versions of Windows inspecting the local SID's of user accounts instead of the username string. 

To resolve this do the following - 
  • Create a new DWORD entry for LocalAccountTokenFilterPolicy in the registry of both nodes, this disables certain parts of UAC.  The registry path is HKEY_LOCAL_MACHINE\SOFTWARE\Microsoft\Windows\CurrentVersion\Policies\System and for clarity the new entry should be a DWORD set to decimal and the value of 1.
  • Configure (from NLB Manager) Options > Credentials on both servers with the local admin account that has been created on each of the servers.
  • Configure the NLB cluster using node IP's and not DNS names (even if you have DNS names configured with the hosts file, I've found IP's seem to work better in a none domain joined NLB cluster).

Tuesday 22 January 2019

DirectAccess reports Error: there is no valid certificate to be used by IPsec which chains to the root/intermediate certificate configured to be used by IPsec in the DirectAccess configuration." when device-certificates are enabled

The amount of accurate documentation on how to implement device-certificate based authentication for Direct Access clients is extremely low. If you’re implementing Direct Access from scratch I would recommend getting it working with AD credentials only, then enable device-certificates once you are confident in the general config. I 
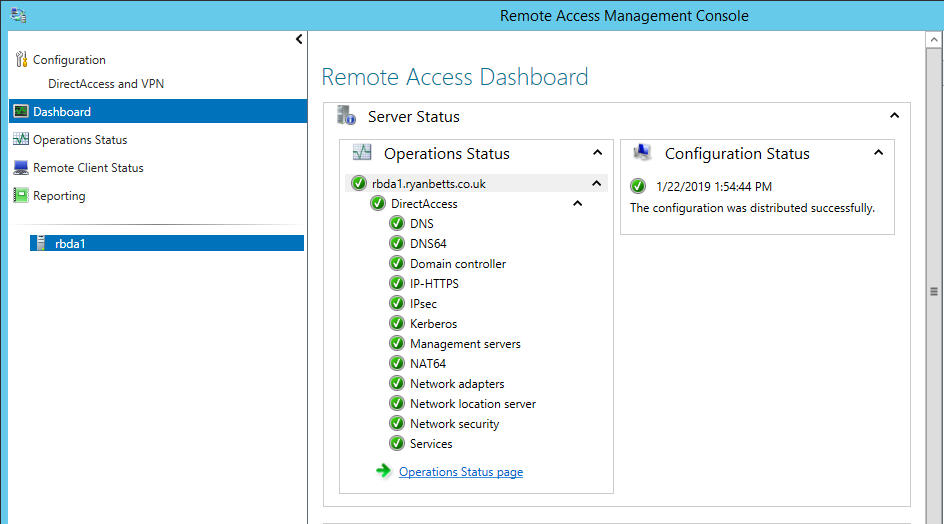
recently did just this, the Direct Access server and clients were functioning correctly. The next stage was to enable Computer Certificates from Step 2 – Remote Access Server.

In my lab I only have a single tier AD CS PKI setup, therefore I selected Use Computer Certificates but did not tick Use an Intermediate Certificate. This would be required if you had a two-tier AD CS PKI.

For clarity at this point you should choose the certificate that is that is issued by your Certificate Authority. It is unclear what else is required to make IPsec work correctly. 


Once you do the above, and Group Policy refreshes you will start getting an error about IPsec not working. 

“Error: there is no valid certificate to be used by IPsec which chains to the root/intermediate certificate configured to be used by IPsec in the DirectAccess configuration.”

“Causes: the certificate has not been installed or is not valid.”

“Resolution: please ensure that a valid certificate is present in the machine store and DA server is configured to use the corresponding root certificate.”


The reason for this error is that a suitable certificate is not installed on the Direct Access server, this might seem obvious. However, the configuration step from Direct Access Step 2 – Remote Access Server does not install a certificate to make IPsec work, it simply points the Direct Access configuration at the PKI to trust for device certificates. 

With that said, you must configure a custom AD CS template with specific settings to make IPsec work for Direct Access, a certificate from this template then must be installed on all of the Direct Access servers.

To do this open up Certification Authority and click Certificate Templates.


Open Manage from Certificate Templates.

Find the default Certificate Template called RAS and IAS Server, right click it and select Duplicate Template

On the General tab give your new template a descriptive name I also select Publish Certificate in Active Directory.


Click on the Security tab and add the context Domain Computers and grant the following permissions
  • Read
  • Enroll
  • Autoenroll 


Click the Extensions tab and click Application Policies, then Edit. 


Click Add from the Edit Application Policies Extension window.


Enter a descriptive text string for the new Application Policy, do not make any alterations to the Object Identifier and click OK. 


Do not forget to do a Certificate Template to Issue to ensure the new template is available for certificate enrolment. 


The next step to fix “IPsec is not working properly.” is to enroll a certificate on each of the Direct Access servers using the new template. It should be installed under the Computer context under the Personal store on each of the Direct Access servers. 


Once this certificate is installed do a gpupdate /force on each of the Direct Access servers, the IPsec errors should disappear.