Showing posts with label RDS. Show all posts

Tuesday, 31 January 2017

Connecting Server 2016 RDS Connection Broker to Azure Database fails with "the database specified in the database connection string is not available from the RD Connection Broker..."

When you try to configure a Windows Server 2016 Remote Desktop Services (RDS) Connection Broker to use an Azure PaaS database instance you get the following error;

"The database specified in the database connection string is not available from the RD Connection Broker server. Ensure that the database server is available on the network, the database exists and is empty (no scheme present), the Database server native client is installed on the RD Connection broker server, and the RD connection broker has write permissions to the database."


The error was caused by a firewall configuration on the Azure side, to alter the settings you must click the Firewall tab of the SQL Server (logical) in Azure, then enable the setting Allow access to Azure Services.


In addition to this click the Add Client IP option which will automatically populate an inbound firewall rule to allow incoming connections from the IP address you are currently accessing the portal via.


Click to Save the changes.


When you try to continue with the RDS installation the wizard will get past the error message. 


Windows Server 2016 RDS Connection Broker HA with Azure PaaS Databases using PowerShell

One of the most welcomed features in Windows Server 2016 when on the topic of Remote Desktop Services is the ability to store the RD Connection Broker state database in an Azure PaaS database instance. In previous versions of RDS, the only method to achieve high availability for the RD Connection Broker was to implement a shared SQL database using AlwaysOn Availability Groups or a similar HA technique inside SQL Server.


Connect to your Azure ARM account

Add-AzureRmAccount

Define the variable and create a new Resource Group

$resourceGroup = "rds2016"
$resourceGroupLocation = "West Europe"

New-AzureRmResourceGroup -Name $resourceGroup -Location $resourceGroupLocation

Define the variables for the SQL Server

$serverName = "rds2016demo"
$serverVersion = "12.0"
$serverLocation = $resourceGroupLocation
$serverResourceGroupName = $resourceGroup

$serverAdmin = "IT"
$serverAdminPassword = "pshere"
$securePassword = ConvertTo-SecureString -String $serverAdminPassword -AsPlainText -Force
$serverCreds = New-Object -TypeName System.Management.Automation.PSCredential -ArgumentList $serverAdmin, $securePassword

Create the new logical SQL Server using defined variables

New-AzureRmSqlServer -ResourceGroupName $resourceGroup -ServerName $serverName -Location $serverLocation -ServerVersion $serverVersion -SqlAdministratorCredentials $serverCreds

Define the variables for the SQL database

$DatabaseName = "rdsdeployment"
$DatabaseEdition = "Basic"
$DatabaseServiceLevel = "Basic"

Create the new database using defined variables

$AzureDatabase = New-AzureRmSqlDatabase -DatabaseName $DatabaseName -ServerName $serverName -ResourceGroupName $resourceGroup -Edition $DatabaseEdition -RequestedServiceObjectiveName $DatabaseServiceLevel
$AzureDatabase


I used the portal to check that the resources had been created properly before I started configuring the Remote Desktop Connection Brokers. 


Now the Azure PaaS database has been created we can now configure our RD Connection Brokers to use it as the state database. Although you must first create some firewall rules on the Azure side to allow communication to your cloud SQL instance. Click the Firewall tab enable Allow access to Azure services and click the Add client IP


Commit the changes by clicking Save.

I have configured my deployment with two multi-role RDS servers, all the roles with the exception of the RD Connection Broker have already been made highly available.


From the Deployment Overview page, right click on the RD Connection Broker and select Configure High Availability.


Select Shared Database Server and click Next.

From your Azure PaaS database click on the Show database connection strings option.


Click the ODBC (Including Node.js) tab and copy the entire connection string. 


You then have to download and install the ODBC Driver 13 for SQL Server, you can grab a copy from here https://www.microsoft.com/en-us/download/details.aspx?id=53339

Once this has been done return to the RD configuration screen and enter the FQDN of the RDS cluster I have configured DNS Round Robin ahead of time for this deployment. Please note you could also use a hardware application delivery controller, this would be the recommended approach as DNS RR does not offer any kind of “failover”. I explain some of the differences in this blog post


You must copy the entire connection string, but please remember to change the password field. 


Saturday, 28 January 2017

Legacy deleted RDS Session Collections still appear in RD Web Access

When you delete RDS Session Collections from the Server Manager GUI you may find that they still appear when users login from RD Web Access. This is because the GUI tools do not properly remove the Session Collections from the RDS Servers registry.


The registry path for Session Collections is Local Machine\Software\Microsoft\Windows NT\CurrentVersion\Terminal Server\Central Published Resources\Published Farms you will see the legacy collections listed under here.


Simply delete these entries and restart the IIS role and when users log back into RD Web Access the old session collection will be gone.


Wednesday, 7 December 2016

Deploying Office 365 ProPlus with Remote Desktop Services (RDS) Session Desktops

I was recently doing  a migration from Citrix XenApp to Microsoft RDS, we had a requirement to have certain applications hosted within the RDS environment. However the organization was in the process of migrating their core communication systems such as Exchange and Skype for Business to Office 365, therefore a traditional RDS installation/license of Office would not be available for the RDS server. It turns out Microsoft have thought of this, and it is possible to install Office 365 ProPlus Click-to-Run within RDS and have multiple licensed users access it using either session-based desktops or RemoteApps.
The RDS deployment is all running on a single server in this test environment, when deploying it I selected the "typical deployment" model, which automatically installs everything on a single server. 


If you are using Office 365 you will probably have AD Connect (or DirSync) running from your Active Directory. If this is the case the licensed users in Office 365 will be known in AD and inside Azure AD which is the identity store for Office 365. It is important to have the users that will be accessing this RDS server (for Office-apps) in the Remote Desktop Users group. By default the RDS wizard populates this with the Domain Users principal. 

Download the Office Deployment Tool https://www.microsoft.com/en-us/download/details.aspx?id=49117 which is required to install Office 365 ProPlus correctly on an RDS server. I don't believe it's possible to do it using the manual download method. When you download and extra the Office Deployment Tool, there will be a configuration.xml file in the extracted folder.
Edit this configuration.xml file with Notepad.
The important lines here for an RDS-based deployment is the <Property Name="SharedComputerLicensing" Value="1" /> this must be added to the configuration file when RDS, or any other kind of shared access to a computer is required. I believe this is also required if you are installing Office 365 ProPlus into VDI, whether it be VMware View, Citrix XenDesktop or even RDS with Hyper-V.

Open up Command Prompt with Administrative rights and do a cd to the extracted directory which now contains the ODT setup.exe and the configuration.xml files.
Run the command setup.exe /download configuration.xml and this will begin the download of the ProPlus binaries that are required. This option is also useful if you are installing ProPlus on mutliple machines and you do not want each device to have to pull down the installation files from Microsoft's CDN.

When the download switch has completed you must run the command setup.exe /configure configuration.xml which will begin the installation of ProPlus based on the information in the configuration file.

The first time each user logs in to the RDS server they will be asked to activate Office. The user's e-mail address which is linked to their Office 365 account is required to do this. They will only be asked to enter this once. 

Friday, 11 July 2014

App-V v5.0 SP2: Sequencing VMware vSphere Client v5.5 using App-V and Testing with Standalone Mode


App-V can be used to virtualize applications to run on top of the host operating system as a virtual process encapsulated in it's own bubble, therefore no direct interface is made with the host operating system. The VMware vSphere client comes pre-packaged and the executable if automatically extracted when you run the setup. It extracts the executable to a temporary location. This is the file required to package the application.


Launch the Application Virtualization Sequencer from the Start Screen, and select Create a New Virtual Application Package.


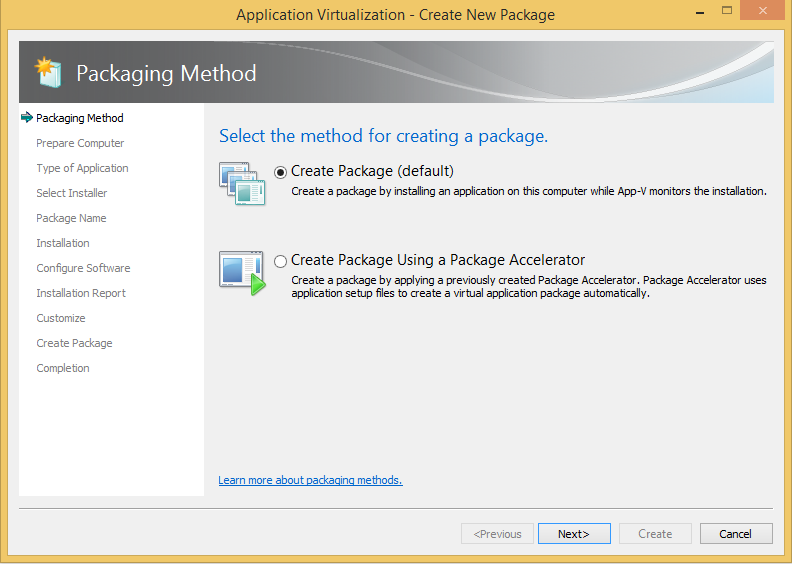
Select Create Package (Default) and click Next to continue.

The Sequencing VM should be as clean and default as possible, the following warnings below are to be expected. Click Next.


Click Standard Application (Default) and Next.


Use the Browse button to select the executable. When most pre-packaged applications extract their executable, they usually also delete the files if you cancel the initial install. Therefore you may have to copy the executable before you close the installation wizard on the first run. Click Next.


Configure the Virtual Application Package Name and select an output directory for the sequenced files. Click Next.


The application will then begin to install as it would manually. Follow the steps until the application is installed. While this is happening the App-V Sequencer is listening and recording any changes the application is made to the system.


When the application installs in full, ensure the I am finished installing box is ticked, then click Next to continue.


The App-V Sequencer then compiles all the changes the installation made to the system.


Some application require first run configuration, for example some applications may need you to accept the license terms on the first run before you can use it. You would do this at this point, the vSphere client does not need anything doing. Click Next.


The Sequencer then checks for any further changes.


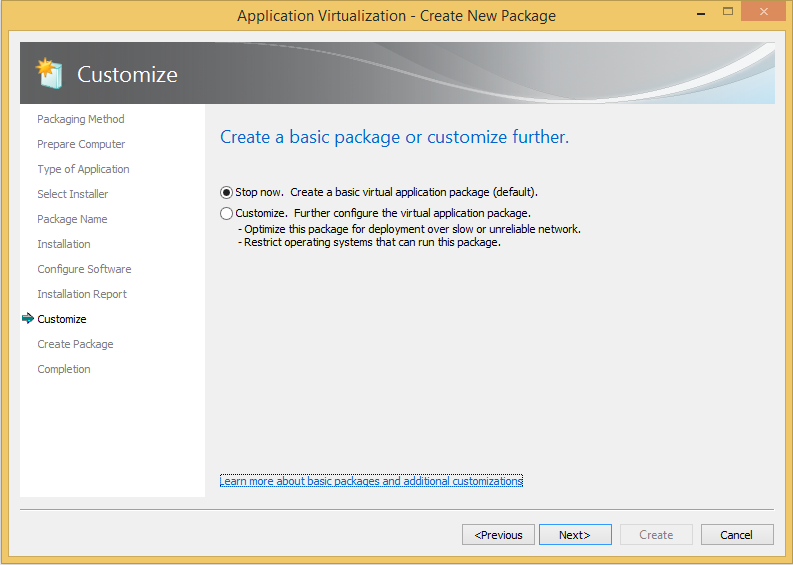
When everything has been completed, select Stop Now. Create Basic Virtual Application Package (Default) and click Next.


Select Save the Package Now and use the Browse button to select a target path for the output files.


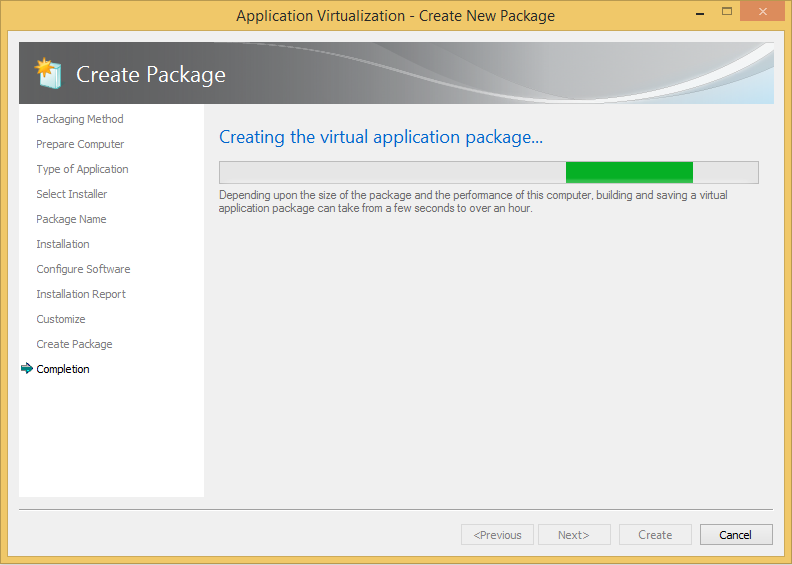
The Sequencer will compile and saves the packaged files into a collection of file, the main application file has the extension .appv


Browse to the configured output location on disk and you will see a collection of files that make up the virtualized application.
 
 
Now to test the new sequenced application. I have copied to App-V files over to a new VM with only the App-V client installed. The first thing to do is to reconfigure the Execution Policy.
Set-ExecutionPolicy Unrestricted


Add-AppVClientPackage –Path “C:\Users\Ryan Betts\Desktop\VMware vSphere 5.5 Client.appv”
 
 
The Name field is the variable that must be used in the next PowerShell command.
Publish-AppVClientPackage –Name “VMware vSphere 5.5 Client”


The first thing I noticed was the vSphere Client icon appearing on the Desktop. Although when I go to launch the vSphere Client it fails to load and displays the Windows Feature install wizard.


This is because the vSphere Client requires .Net 3.5, I manually enable it with DISM.exe using the following command;

DISM.exe /Online /Enable-Feature:NetFX3 /Source:D:\sources\sxs

Now if you attempt to launch the VMware vSphere Client, it should launch without issue.


The App-V Virtual Application Management interface can be launched from the Task Bar on the VM hosting the App-V Client.  Although Net 3.5 was enabled manually in this instance that obviously would not be possible in a large enterprise environment.


You can use Connection Groups in App-V to link applications together that have dependencies on one another, therefore you could Sequence Net 3.5 and link it with the vSphere Client with a Connection Group. This would remove the need to manually enable this as a feature. Although most enterprise environment will probably have Net 3.5 enabled on their client devices anyway.