Tuesday, 28 July 2015

Convert-MsolDomainToFederated - ADFS "You cannot convert the specified domain to use identity federation because the account you are currently signed in with is a member of the domain. Please sign in to the service using an account that is a member of the company administrators

When you try to convert your Office 365 domain to federated in order to use SSO with ADFS you recieve the following;

"You cannot convert the specified domain to use identity federation because the account you are currently signed in with is a member of the domain. Please sign in to the service using an account that is a member of the company administrators."


This threw me at first but it was because I had authenticated to Office 365 using a Global Administrator account that was configured with my public domain suffix (edin-networks.com) in this example. The fix was to create a new Global Administrator user that was set to use the .onmicrosoft domain suffix.


Ensure the Global Administrator role is assigned to the user account.

Create your PowerShell connection and the Convert-MsolDomainToFederated command should work correctly.


Friday, 17 July 2015

Configuring AD FS Client Settings using GPO's

Updated - 24 August 2016

Requirements for SSO to Office 365 on a Windows 7 Enterprise PC;
·         Microsoft Online Service Sign-In Assistant (installed on PC)
·         The SSO service URL added to the Intranet Zone in IE
The Microsoft Online Service Sign-In Assistant can be downloaded from the following link;
It comes pre-packaged as an MSI so you can push it out through Group Policy, if you do not have a more modern software deployment mechanism such as SCCM etc. This installer basically adds a new service called Microsoft Sign-In Assistant to the PC, this service must be running for SSO to work correctly.

To configure the Intranet Zone either create a new GPO, or add the following settings to an existing GPO. 

Click on WMI Filters, right click and create a new WMI Filter.  Give it a descriptive name, in mine I have used "Windows 7 Filter".
The following query strings will ensure that only Windows 7 endpoints are given the GPO settings.
select * from Win32_OperatingSystem WHERE Version like "6.1%" AND ProductType="1" AND NOT OSArchitecture = "64-bit"

select * from Win32_OperatingSystem WHERE Version like "6.1%" AND ProductType="1" AND OSArchitecture = "64-bit"


Click on the AD FS Client Settings GPO, and from the WMI Filtering drop down, click on the new WMI filter you just created to ensure it is bound to the GPO.

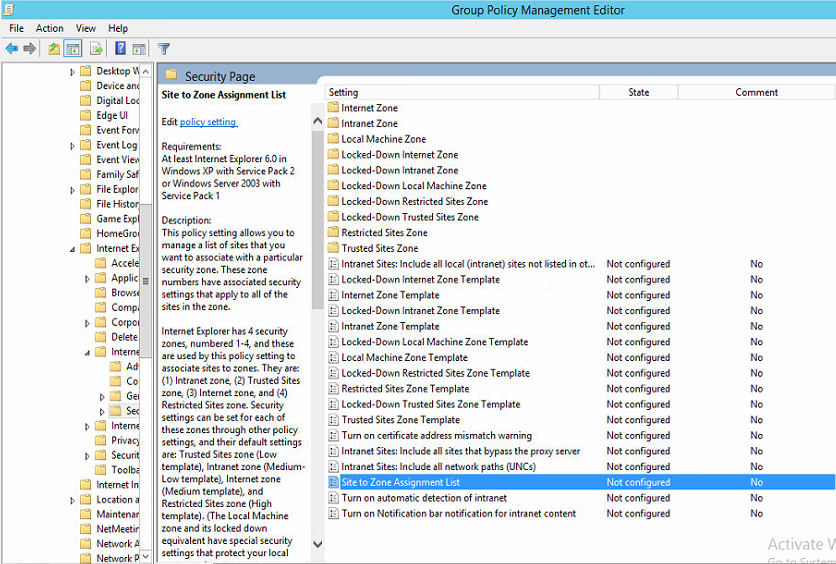
It is probably best to scope this setting to the Computer instead of the User account, edit the GPO and expand Computer Configuration/Policies/Administrative Templates/Windows Components/Internet Explorer/Intern Control Panel/Security Page and double click the Site to Zone Assignment List.

Click Enabled and then Show...

In the Value Name string enter the AD FS service URL, and the value of 1. The value basically corresponds to the zone that this policy applies to.
1 = Intranet/Local Zone
2 = Trusted Sites
3 = Internet/Public Zone
4 = Restricted Sites

Review the settings from the Settings tab, now scope the GPO to the correct Domain/OU.

Tuesday, 14 July 2015

Microsoft Surface Pro 3 Boot from USB Not Working

Easy blog post which may not help many IT Professional but if your a consumer this post hopefully helped you. 

I recently got a Microsoft Surface Pro 3 hybrid device for using at work, it's a nice device that is lightweight and powerful so perfect if you travel a lot like me.

As I passionately hate the OEM builds of Windows you get on next devices the first thing I wanted to do was to rebuild it myself with a clean Windows 8.1 Enterprise image.

Obviously the Surface 3 does not have an optical drive so the only options are to boot from USB, PXE or attach an external DVD drive. I do not have an MDT/PXE server setup and handy so USB was my only option.

The official manual says to boot a Surface Pro 3 you do;
  • Turn Off Device Completely
  • Press/Hold Volume Down Button
  • Turn Device On
  • Release Volume Button when Surface Splash Screen Appears
This for whatever reason did not work for me so I started looking around on forums, and someone had mentioned if you rename your USB drive with Windows on to "BOOTME" it forces the Surface to boot from it. Never worked for me.

The only way in which I could get a new operating system installed was to run the Windows 8.1 setup from the old installation.


If you do it this way (which from what I can remember never worked in older versions of Windows) the setup automatically reformats the SSD disk and reinstalls everything for you.

I found that after the first reboot the Surface hangs at the Surface splash screen, the fix is to hard reset it while leaving the USB drive inserted.

Thursday, 9 July 2015

NetApp Clustered ONTAP 8.x Cluster/High Availability "Node NetAppNode has some LIF's that are not in their home node" Orphaned LIF Interface

I was recently checking over the configuration of a NetApp FAS 2252 to ensure it was installed correctly before it gets handed over to a customer. In doing this I checked the High Availability section under Cluster and then the NetApp Cluster name.
There was a yellow warning box above the NetApp HA diagram that stated "Node NetAppNode has some LIF's that are not in their home node", although I was confident this would not affect the failover itself I wanted to get rid of the error. 
Connectivity to SVMs is provided through logical interfaces (LIFs). A LIF has an IP address or World Wide Port Name used by a client or host to connect to an SVM. A LIF is hosted on a physical port. An SVM can have LIFs on any cluster node. Clients and hosts can access data regardless of the physical location of the data in the cluster. The cluster will use it’s interconnect to route traffic to the appropriate location regardless of where the request arrives. LIFs virtualize IP addresses or WWPNs, rather than permanently mapping IP addresses and WWPNs to NIC and HBA ports. Each SVM requires its own dedicated set of LIFs.


Open up an SSH session to the SVM mgmt IP, and use the following command;
network interface show

This will display all of the LIF interfaces assigned to the SVM's on your NetApp, I only have one SVM and as you can see it has three LIF interfaces. If you look above the SVM line (circled in purple) you will see one of the LIF interfaces is orphaned. This is what was causing the error.

The following command can be used to re-home the orphaned LIF interface.
network interface revert -vserver vservername -lif lifname


If you return to the GUI interface you will notice is warning has disappeared.

Wednesday, 8 July 2015

Completed my CCNP Data Center!

I originally done CCNA Routing and Switching about 4~ years ago when I was working for a Cisco Premium Partner. After that I did CCNA Security as I was doing loads of work with Cisco ASA firewalls, so it made sense. Then when I moved into a more infrastructure-focused role the importance of doing Cisco certifications lessened, so I stopped at CCNA-level, then as you know with certifications if you don't renew them you loose them.

With that my original CCNA certifications expired in around May 2014, at the point in time I was heading to Bermuda to work with CCS Group (http://www.ccs.bm/). Part of my original immigration to go to Bermuda had a requirement for me to be Cisco CCNA certified (did not matter which track). At this point all of my other certifications were up to date and good to go except my CCNA, so I had to get back on the Cisco band wagon.

CCS Group in Bermuda are/were a Cisco partner, so Cisco UCS and Nexus Switching was something that was being sold and implemented for customers on a regular basis, so with that in mind it made sense to go for the CCNA Data Center.

Last July I completed both the exams required to achieve the CCNA Data Center certification, and Bermudian immigration were happy. It was also my intention to go to CCNP-level as I have went to "professional" level with most other vendor certifications. 

After 11 months of studying (on/off around other certs that were more "important" for the job at hand) I completed the last CCNP DC exam this morning to earn me a CCNP Data Center.


To study I used mostly Cisco documentation and for the later part of this year the newly released video material from INE and CBT Nuggets. The INE content is first class, and covers everything you need to know if you were to implement UCS/Nexus in real life, I found (after I failed 642-996) that it was lacking some of the "exam specific" content (but to be fair which training course isn't)?

In addition to this the following books were worth reading; 

This Cisco Press UCS book is good, but very outdated being released in 2010. It still covers the architecture of Cisco UCS very well, you should either ignore the hardware specific details or map the old hardware that is referenced in this book, to what is now the modern day equivalent. 


http://www.amazon.co.uk/Cisco-Unified-Computing-System-Center/dp/1587141930/ref=sr_1_1?ie=UTF8&qid=1436380708&sr=8-1&keywords=cisco+ucs

Great book, that you need to pass this certification. Simples.


http://www.amazon.co.uk/Data-Center-Virtualization-Fundamentals-Understanding/dp/1587143240/ref=sr_1_2?ie=UTF8&qid=1436380708&sr=8-2&keywords=cisco+ucs

There are also a number of good reference architectures and design guides out on the internet from multiple vendors such as Cisco, NetApp and VMware that really pull together all the dry theory into real world examples.

You will also need the Cisco UCS Emulator, unless you have a couple of hundred grands worth of equipment laying around to practice on.


Monday, 22 June 2015

The server vc01.company.com could not interpret the client's request. (The remote server returned an error: (503) Server Unavailable. Call "Service.RetrieveContent" for object "ServiceInstance" on Server "dreamline".

When you try to login to the VMware vSphere 6.0 vCenter using the C# client you recieve the following error "The server vc01.company.com could not interpret the client's request. (The remote server returned an error: (503) Server Unavailable. Call "Service.RetrieveContent" for object "ServiceInstance" on Server "dreamline".", the Web Client is also not responding.

To fix, firstly reboot the vCenter server. Either RDP to it, or login to the ESXi host that is hosting the VM and restart the guest gracefully.

Let the vCenter come back online and ensure you have left enough time for all of the services to start if you are using vCenter on a Windows Server. Once noticable improvement in vSphere 6 is the speed all of the servers come online.

Secondly, SSH to the problem ESXi hosts and issue the following command;

/sbin/services.sh restart  

You should then be able to login to vCenter.

Sunday, 21 June 2015

Configuring Citrix NetScaler to Load Balance ADFS v3.0

Configuring Citrix NetScaler to Load Balance ADFS v3.0

The link below is broken, I also do not have a copy of the full document I created in July 2015. Do not e-mail me directly asking for a copy.

To ensure ADFS and the WAP servers are highly available a hardware load balance is recommended. In this example I have outlined how to configure Citrix NetScalers to do this. If you are deploying ADFS for Office 365, it is important that the service is highly available otherwise users will not be able to authenticate to ADFS. 

Microsoft supports NetScaler as a hardware load balance but there is lack of documentation around how to deploy the two solutions together.

Some of the configuration settings such as MAC based forwarding, SSL bridging, session persistence and Client IP header are some of the settings that are not obviously required.

Although the full guide I created no longer exists, I have summarised how to configure the NetScaler to load balance ADFS 3.0 below. This is not a full and conclusive guide. I won't be re-doing the guide until I am asked to do it for a customer. 

Although this diagram is for MS Lync, it's similar for ADFS. Imagine you have 2 x WAP in the DMZ and 2 x ADFS in your LAN. 


Most places won't have two separate physical NetScaler pairs. The above topology can be achieved using a single pair of Netscalers, with network interfaces on each of the DMZ/LAN networks. Netscaler vServers can then be used to load balance each component. If your security requirements state you must have a physical break then it's different.

High level steps (from memory)

  • Base configure the Netscalers (NSIP, SIP, routes, default gateways etc)
    • at this point it's important to have an interface on each network. If you are deploying the ADFS WAP servers, these should be in your DMZ. Therefore an interface from the NS is required on each of the separate Layer 2 networks. 
      • if you have problems research "Mac based forwarding"
  • Configure high availability of the Netscalers
    • Easy to do, Google it. I normally set my HA configuration to Active/Passive.
  • Define the server's both ADFS and WAP
    • Traffic Management/Load Balancing/Server
      • Create a new server object for each of the ADFS/WAP's. Set the protocol to SSL Bridge
      • Create a new service one for the WAP's and one for the ADFS's. Traffic Management/Load Balancing/Services
        • service 1 = "adfs_https" protocol SSL Bridge
        • service 2 = "wap_https" protocol SSL Bridge
  • It's important the protocol type matches on the servers/services.
At this point, if you servers are listening on TCP 443 (https) and you have configured the networking correctly the server/services will show as "up" and the light will be green. If not there is some kind of networking problem (remember your WAP servers don't listen on 443 until you have them successfully paired with the ADFS servers)

  • You should configure SSL session persistence (I cant remember the exactly menu, you either do this in the service configuration or on the vServer, check eDocs)
  • Now create a new vServer for each the WAP's and the ADFS's
    • vserver1 = "adfs" give the vserver an IP on the network the backend servers sit on
    • vserver2 = "wap" same as above
  • When you create the vserver, bind them to the corresponding service (adfs - adfs etc), and set the load balancing method to round robin.
DNS 

Now you have the NS configured, on the WAP servers create a hosts file entry to point your ADFS service name i.e sso.domain.com to the NS vServer for the ADFS servers. Try to run the WAP-ADFS pairing. If you get an error check out the bindings.


Friday, 19 June 2015

Resetting an F5 Networks Big-IP System's Root Password from the Console

I was recently asked to configure a pair of F5 Big-IP's for a customer, the Big-IP system is something I have only limited exposure to but as I know Citrix NetScaler (which is also an ADC) I thought the concepts would be pretty similar, which they are!

I did a configuration using the Big-IP virtual appliance in ESXi so that I could test the functionality using emulated networks etc. So the plan was to export the config and then replace the config on the new box, thus saving time going through all the steps again. I made a stupid mistake in that I tried to restore the config (which had services such as SNAT enabled) to a device with nothing other than the base license. So in short when the device rebooted it hung at this stage.


I opened a console session which is where I realized my problem.


My next plan was to factory restore the device and start again. After I pasted on the config something weird happened with the logins, both the administrators and the root passwords would not work, either from the new config or the old one.

Quick job turns into an episode, so I had to reset the root password to factory reset the device. To do this open a console session (I had to set my BAUD rate to 19200 for it to work) and then hard reset the device. Break the boot sequence and highlight your operating system image and press E.

Resetting an F5 Networks Big-IP System's Root Password from the Console


From the sub menu highlight the line that start kernel /boot/l/vmlinuz and press E again.


Type the word single onto the end of the string on the page, and hit enter, this will take you back to the main page.


Press Esc to get back to the main boot screen and hit enter while you are on the operating system image, this will boot the F5 into single user mode in which you can reset the password.


You will be prompted from logname: no login name.


Type passwd to launch the password reset script, set the password and then type reboot to cycle the device. When it comes back up you should be able to get in with your root account and the new password.


Monday, 8 June 2015

Active Directory Federation Services (AD FS) Web Application Proxy "The operation stopped due to an unknown general error. Error Code 0x8007520C" and "Unable to retrieve proxy configuration data from the Federation Service."

The AD FS WAP throws the error "The operation stopped due to an unknown general error. Error Code 0x8007520C" and it is reporting Critical Errors under the Operation Status. The AD FS infrastructure is out of action when this is in this state.

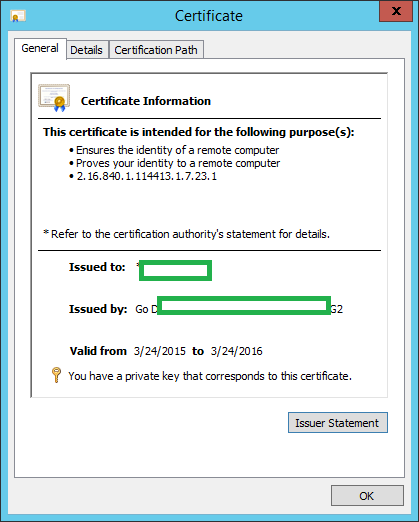
From the Event Logs there are multiple errors relating to the issue the first is Event 422 "Unable to retrieve proxy configuration data from the Federation Service." It also lists a Certificate Thumbprint that is nowhere to be found from the certificate stores. I would expect this to be the thumbprint of the shared SSL certificate that is also installed on the AD FS servers, but it is not.

Event 394 is also present "The federation server proxy could not renew its trust with the Federation Service. Additional Data, Exception Details: The proxy trust certificate specified by thumbprint {0} has expired."

The following command can be used to try and reset the AD FS WAP configuration. I found this from the following blog post http://www.concurrency.com/infrastructure/web-application-proxy-fails-error-code-0x8007520c/ unfortunately Shannon's fix did not work for me in this instance.
Install-WebApplicationProxy –CertificateThumbprint “thumbprint” –FederationServiceName “sso.domain.com”


It returned an error "The certificate that is specified by the CertificateThumbprint parameter could not be found in the Local Computer Personal Certificate Store", this was strange as I confirmed the certificate was present, valid and had the matching thumbprint.


The next step was to remove the Remote Access server role entirely and then reinstall and configure it. I used the following PowerShell command, I also deleted the certificate that was originally configured to work with the WAP so that I could reinstall it fresh. This can be done from the CLI or from the Certificates MMC snap-in.
Remove-WindowsFeature RemoteAccess, Web-Application-Proxy -Restart


Once the servers have rebooted, reinstall the Remote Access (WAP) server role. Ensure the certificate has been imported back in and it has the matching private key.
Install-WindowsFeature RemoteAccess, Web-Application-Proxy -Restart

When you launch the Remote Access Console you should be able to run the wizard again, once I did this the WAP server worked as expected again. It was a strange problem which I think was related to the certificate. If you have details on a fix without blowing the config away please share below.

Saturday, 30 May 2015

Integrating Visual Studio 2013 with Microsoft Azure Websites

There a number of ways to interface with Azure Websites including Web Matrix, PowerShell, X-Plat and even Visual Studio. This is handy as Visual Studio can be directly integrated with your Azure subscription so that you can publish your web applications and sites seemlessly from the Visual Studio IDE environment.
You must first install the Microsoft Azure Tools for Visual Studio. Please note that you need to have the Web Developer Tools installed for Visual Studio.

Just to test this integration I simply created a new application from one of the templates from the wizard. Click Tools and then Connect to Microsoft Azure Subscription.

You will then be prompted for your Azure subscription details, enter them and you should be able to expand Azure from the Server Explorer. If you have already created an Azure Website expand Websites and right click on it and select Download Publish Profile.

From the Solutions Explorer window you can right click on your project and select Publish. If you have not already Build the site and effectively compiled it, this option will be grayed out.

Click Import.

Browse to the Publish Settings file you downloaded in the earlier step.

Review the settings and click Publish.


Microsoft Azure Websites Part 1: Overview of Azure Websites

Azure Websites
Azure Websites are fully managed containers to run Web Applications and Sites. Azure Websites are not Azure hosted Windows Servers with the Internet Information Services (IIS) role installed, Azure Websites are Platform-as-a-Service (PaaS) thus Microsoft manage all of the under lying infrastructure that serve your websites and applications.
Azure Websites can be created using the Azure PowerShell SDK, the Azure Management Portal or the X-Plat CLI tools. When you create a new Azure Website you must specify the following;
  • A unique URL for the website/application at .azurewebsites.net
  • An App Service plan
  • A pricing tier
  • A resource group
  • A subscription to link it to
  • A location for the website to reside
Figure 1: Summary of new Azure Website
Azure Website Pricing and Resource Tiers
Azure Websites are available in four different tiers, each of which offer different amounts of resources and consumables that are available to the application or website.
The tiers are Free, Shared, Basic and Standard. Microsoft generously offer an entirely free Azure Website tier which can be used to host simple websites and applications, although this has some limitations such as a maximum daily bandwidth limit of 165Mb’s. As the tiers increase so does the price, but with this you’re Azure Websites are given more resources on the underlying Azure infrastructure.
The Free and Shared tiers both run on shared VM instances under the covers, but the Basic and Standard tiers have dedicated instances for any applications or websites being hosted. It should be noted that there is no interference between tenants who are potentially sharing a VM instance for example to host their web application.
Furthermore the Free and Share tiers only have a single instance tier, whereas the Basic and Standard come with three instance types for example B1, B3 and S2 for example, each of the resources for that instance increase. 
Figure 2: Overview of the Resources Available for S1 and B1
Enhancements such as built-in load balancing is also included with the Basic and Standard tiers, whereas this is not available for Free or Standard.

Figure 3: A Comparison between Basic and Standard Tier Instance Types
Data transfers for Azure are fairly standard across the board, inbound data transfers are not changeable but egress traffic from the Azure data centers is charged at a per GB/TB rate, the first 5Gb’s outbound is free across all zones.
You can read more on this at the following site as it’s likely to change http://azure.microsoft.com/en-gb/pricing/details/data-transfers/
Azure Website Quotas, Limits and Constraints
Most of the services that are available in Azure have two limitations, a default limitation and an ultimate (or hard) limit. The default limitation is the soft limit in which Microsoft has set on a service, this governs the amount of resources that is available to a given “stock service”. This default limit can normally be increased if you approach Microsoft with a valid reason and use case as to why you want it increase. The ultimate limit on the other hand is the maximum limit that is available to a given resource, Microsoft cannot expand this limit.